
In 2019, I finished writing and designing a company history book, which was a project that originally began in 2014. Due to the complexity of the project, I’m going to explain my process here for those that are starting a project like this and need advice. I found little in my journey. The advice below could be adapted for similar complex research, writing, and design projects.
Background
Writing a book is hard. You’ll get attached to the project and the people you meet, but remember, if you’re hired to write a company history, you’re essentially a ghost writer. It’s not personal to you even if it feels like it. Don’t be disappointed if you can’t add this work to your portfolio or make a claim as an author. Don’t worry. You still get to claim the experience, and that’s not nothing.
Archive Building Process
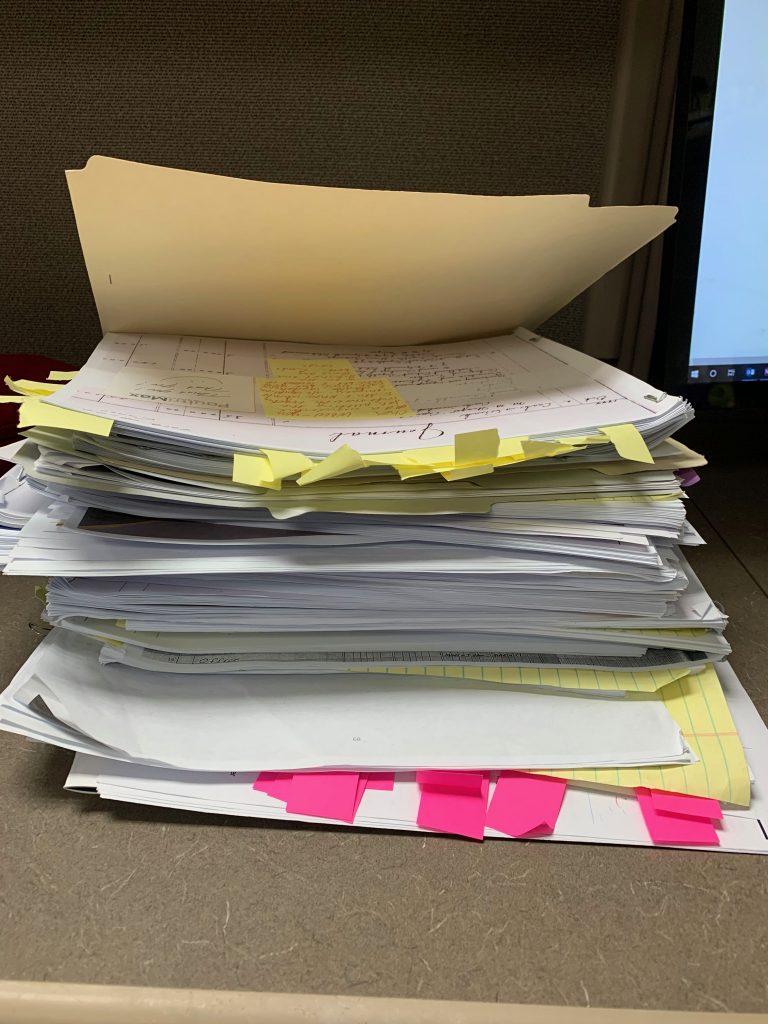
You’re going to need artifacts and lots of them. Start the process by collecting everything you can about the project and organizing it in an archive. You’ll want to organize items in chronological order if possible.
For my project, I had three boxes of photos that I organized in chronological order within the boxes. Each box was then numbered with number one being the oldest photos.
To date photos, it’s helpful to look at the cars in the photos. It’s fairly easy to date a car by year, which will give you a rough idea of the date of the photo.
If you can’t date the cars, consider contacting a car club for the brand in question. They’ll happily give you a hand.
For location photos, I posted several in Facebook groups dedicated to the town where the company was located. The users on the group were very helpful in dating the location photos based on changes in the landscape and their general experience with the area.
I saved all the messages and input I received from these sources to share with the team.
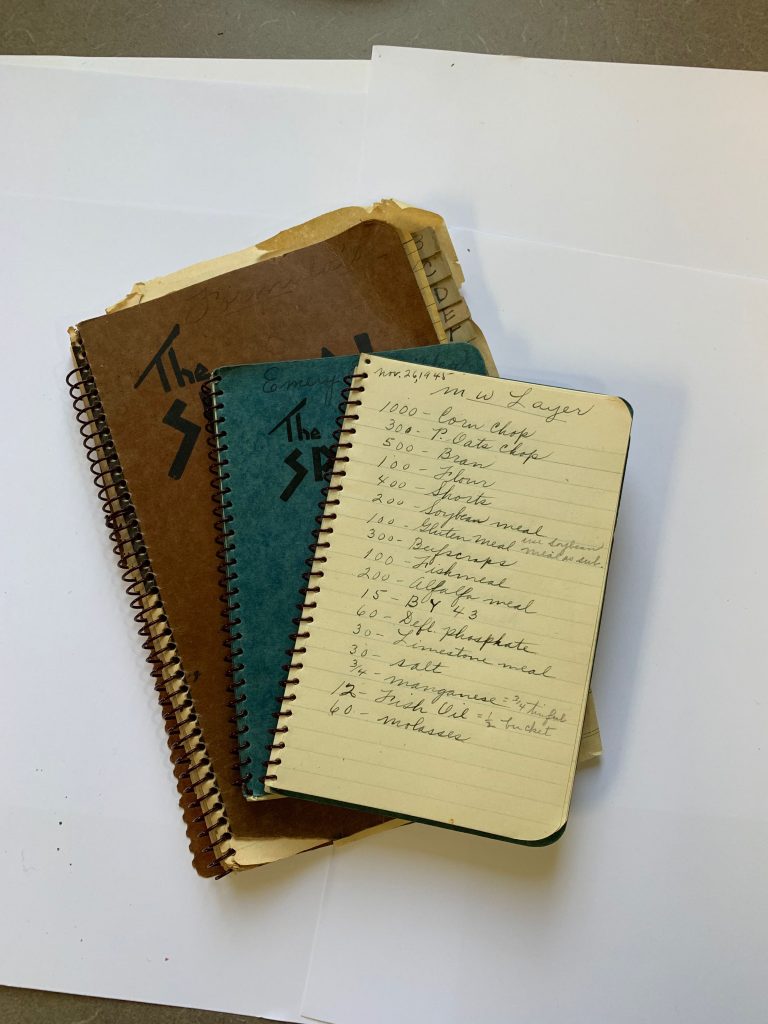
The paper documents were also placed in boxes and organized by year. Some of the paper documents given to me were already in three ring binders in sleeves. I left those intact.
If you’re storing printed material or any material really, you only need a few samples of each item. Your archive is going to be huge, so don’t save a box of brochures, cards, or calendars. You won’t have room.
Digitize everything you can. Digital archives will make it much easier to view and select the material later on. Don’t keep negatives, slides, reel-to-reel, 8-tracks, cassette tapes, VHS tapes, or DVDs. If you can’t play them or view them in the future, don’t keep them.
Find a vendor to digitize all your material, and then store it in the cloud. You’ll need a drum scanner to do your slides, and many camera shops have this equipment and can do it for a small fee per slide. If you can, view the material before you commit to digitizing it. Deciding it if is worth keeping first will save your budget.
There were several customer presentations that I did not save as they really didn’t relate to the company’s history.
For the items, take a photo of each item. If you can document the size of the item, do so. For the frames, I documented the size. Then, select a way of organizing this material that makes sense for your project.
For me, I had no way of dating most of the items, so I organized it by type. The company had made several acquisitions and had changed names several times. Those felt like natural breaking points to label the boxes.
Organize all the actual items in a spreadsheet. I made an attempt to organize my spreadsheet by date and type. The columns included the item name, a decade (this may be an educated guess), the image number that corresponded to the item, and the box the item was stored in.
Professional archives will also number each item and attach a tag to each item with the reference number. Porcelain items contain a small label that is attached and then painted over with a clear adhesive. I did not take this extra step, but you may consider it.
Check out the Metropolitan Museum of Art’s furniture archive in the northwest wing of the museum. It’s located near the American Furniture wing. This space is organized like an archive with climate controlled shelving and furniture placed on open air shelves. You can see the tagging system in action.
This sounds like a lot of work, but once you’re in the process, you will be glad you did this legwork ahead of time.
As you’re organizing your archive, be very deliberate about what you save. If the item is interesting but doesn’t relate to the company you’re profiling, you may not want to keep it. Consider donating it to your local historical society.
Also, do not keep anything that could be considered food. You won’t be in your archive every day, and if you store anything that could be eaten, insects may find it and eat it and everything around it before you know something is amiss. For me, I had a few boxes of old animal feed that I threw out for safety reasons.
If you need help with your archival process, consider contacting your local historical society. Lancaster History was a great help to me in the process. I toured their facility after I had constructed my archive and made some changes based on their suggestions. https://www.lancasterhistory.org/
Proper Storage
Historical items need special attention due to their age. Store your items in a climate controlled room with speciality boxes and materials. If you are using wooden shelves, be sure to cover them in plexiglass. Many shelving units are constructed with oriented strand board (OSB) or plywood, which are both constructed with glue. Over time, this material breathes, and the fumes can damage your items. I had a local sign vendor make sheets of acrylic to cover the shelves.
The material storage was one change I made after consulting a professional archive. Store your documents and fabrics in acid-free boxes with acid-free tissue paper to prevent discoloration.
You can find quality archival materials at Gaylord. https://www.gaylord.com/
Getting Started: Interviews
If you’re working with a company, chances are there is at least one individual that will be your primary source material and contact. This person may even have been the individual driving the project. Be sure to find out who this is and start here. You’re going to want to spend a lot of time with this person. They’re also going to be really excited to share their knowledge and the conversation may go everywhere.
Try to start with a general outline of the history desired and then steer your conversation in blocks of time so you don’t miss anything. Be prepared to backtrack frequently to gather all the threads of the story.
One hour blocks of time will provide a wealth of information without exhausting the contributor. If you’re working with executives, chances are they won’t have more than an hour to spare anyway. Write your questions down and ask them in order to ensure you make the most of the time.
Record your conversation. I used the iPhone’s voice memo tool. Be sure to check your device to ensure it is recording and place it close to the speaker. I never used two devices to record, but you may consider it for backup. You don’t want to have to recreate an interview.
You can transcribe it yourself if you have the time. I did some of my own but also relied heavily on Rev. https://www.rev.com/
Read over the transcript carefully to prepare for your next interview and determine other interview subjects.
If you have to contact outside resources, be sure to tell them you need their time for a history book. Most people will be happy to help. For my interview subjects, I could promise them both a book and an invitation to a book launch event. I often also bought them lunch or coffee and met in an informal setting. I think most would have talked to me even without those enticements.
The interview phase could last for months or years depending on the time you have to devote to the project.
Be sure to have questions prepared for everyone you plan to talk to. I started each interview with small talk while the recorder was running. Recording a conversation can make someone nervous, so it’s important to make them feel at ease before you start.
Also, some people will be more interested in talking than others even if you suspect they have something to share. My shortest interview was ten minutes. My longest was four hours.
Finally, pick a quiet place. If you’re going to a coffee shop, stop by the business at the time you plan to be there to determine the atmosphere. One interview I had turned out to be in a loud restaurant, and as a result, the conversation was very hard to transcribe.
Once you have the interviews in hand and the archive constructed, you’re ready to begin writing.
Read on.
The Writing Process
Start by reading all your interviews and highlighting the text you wish to use. I made a handwritten outline of the story and filled in blocks of interviews I wanted to use in each section.
I worked solely on this project for one day a week for about three months just to get the text outline in place.
If you have something spectacular that may not fit, be sure to mark it. It may fit in a special aside or in the back material. For my project, the company history was also a family history in many respects. I asked everyone for their personal memories of the company founder and eventually used all that material in the back material of the book.
When you’re writing, be sure to make it interesting while keeping the story moving. If you’ve been hired to write this, you’re sure to have a handful of editors to please. Be sure to ask questions when the changes come back. For my project, it was helpful to edit the pages with the main editor and driver of the project looking over my shoulder. It can be hard to interpret someone’s written notes, and time is money. Ask for clarification.
I would have preferred to finish the text prior to starting the design, but the desire of the team was that both be done at once. I had a longer draft written in Word with marks to indicate what assets I wanted on which pages. This was a general design outline, and the final version looked much different.
Finding a Printer
Check around your area for a printer that can do a case bound book. It’s a little different type of printing, and the lead time is much longer. Try three months in my case.
If your book must be published in a certain time frame, be sure to build a timeline that will work for you and carefully convey that timeline to your team. For me, I built in an extra three weeks that I didn’t share with the team. This gave me some overflow time. It turns out I needed it, so be wise in creating your expectations.
Be sure to consult with your printer about the page layout. The team had already selected the size book they wanted, which was 11 inches wide by 9 inches tall.
For my project, I laid out the text in InDesign with the standard page size plus a .5 in margin on each side and a .2 in bleed. This is going to be perfect bound, so page count didn’t have to be a multiple of two. The gutters were no larger than the other margins.
Per the printer’s request, this was also laid out without facing pages. When I printed the drafts for review, I stapled them together to indicate the spreads.
The outer material is actually linen, and you have some choice in color. I borrowed a linen swatch book from the printer, and the team selected a dark navy with a gold embossed imprint on the cover and spine. There was no dust jacket.
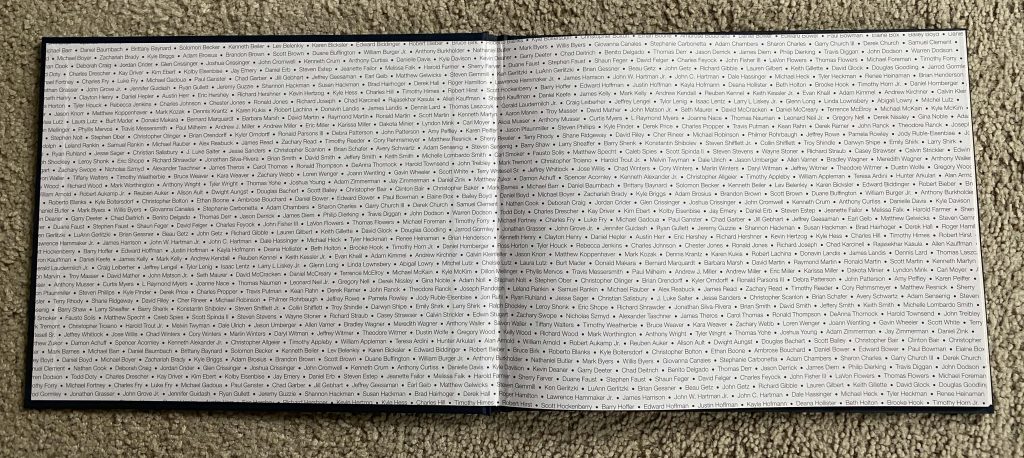
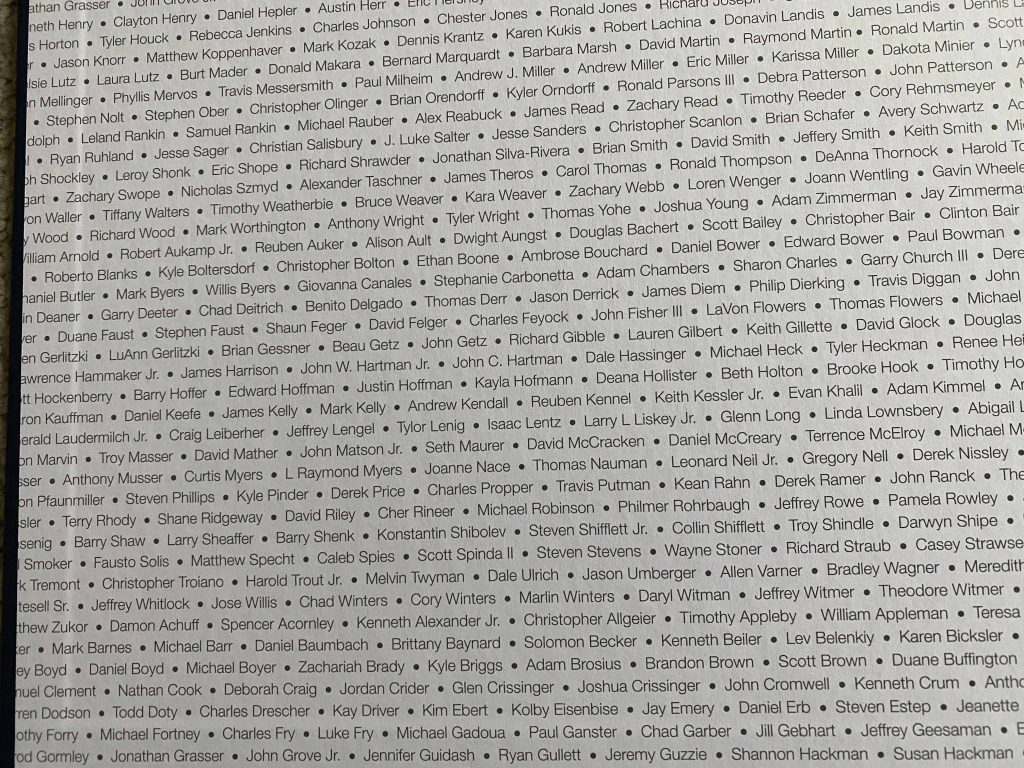
For my project, the endpapers were also printed. This is the page at the beginning and end of a book that adheres to the hard cover. They can be printed on one side. This was laid out in InDesign with bleeds.
The end papers were printed with the names of all the employees at the company at that time. The team was concerned that every person in the list was able to find their name, so I sized the text so the entire list was repeated three times. There were small bullet glyphs in between the names for separation.
Costs
The cost to print 1,000 of these books was roughly $20 a copy.
Given the amount of work involved, if I were to freelance a similar project, I would have charged $50/hour at minimum. If you’re quoting a job, make sure to figure in expenses like travel, meals and drinks for your interview subjects, and transcription fees. If you aren’t setting up the archive, make sure it is set up in a way that is going to be suitable for your project.
Design
Once the book is laid out, it’s time to settle on a design. For this project, the team had a similar book they were hoping to replicate. This was heavy on images and light on text.
I set up the book with master pages to contain the page numbers and with several different grids to keep the design consistent. The company brand’s secondary colors served as the basis for the color palette. The brand standards also dictated the fonts, which were ITC Garamond and Gotham.
Once you have the base set up, it’s time to select the assets for each page.
Now, aren’t you happy you photographed everything in your archive?
Sure you are.
Start with the lowest hanging fruit – the photographs. I took my three boxes of carefully curated photos to my desk and has an assistant scan them as I needed them.
For the personal story of the founder’s life that started the book, I asked the family for some personal photos. I even took some things off the wall at one of the interview subject’s houses. For framed photographs, I took them to a professional framer to have them removed and reframed.
If you’re working with someone else’s assets, be sure to return them quickly and in great condition. You don’t want to be responsible for an heirloom going missing or being damaged.
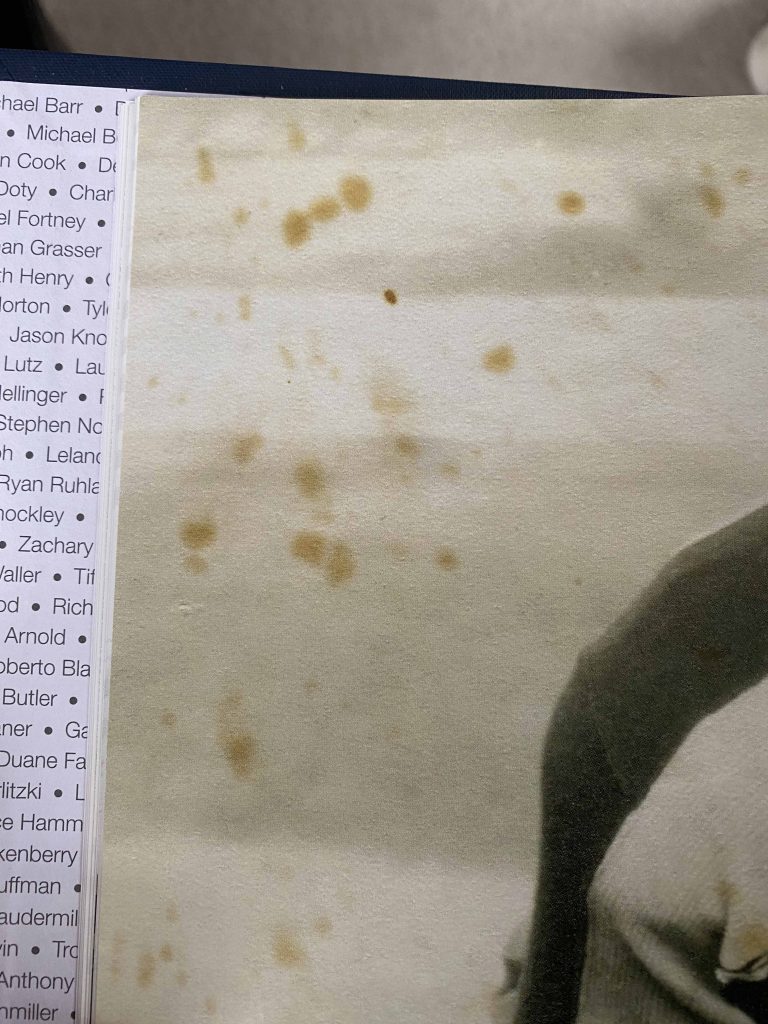
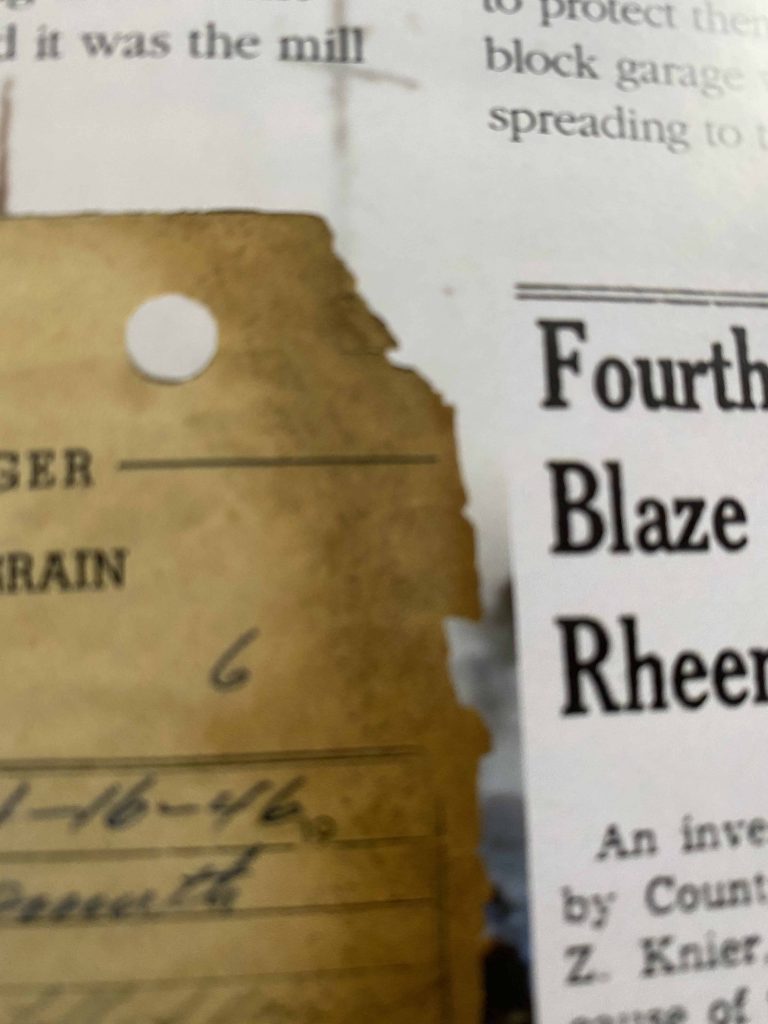
Speaking of damaged, some of the photos I had access to were damaged including color fading and discoloration, torn edges, and foxing. I left the damage in rather than editing it out. To me, it added to the authenticity of the book to leave it in.
Nearly all of the photos I had were printed photos, and they were scanned with a flatbed scanner. This is time consuming, so get help if you can.
I asked that the photos be scanned in the middle of the bed if possible so that the edges of the photos were accessible to me. I also, in many cases, used the slight shadow created by the scanner in the final result. This allowed the items to appear as if they’re floating off the page without adding a shadow effect in InDesign. Also, if the photos are torn or cracked or have those lovely scalloped edges, you can take advantage of that authentic detail.
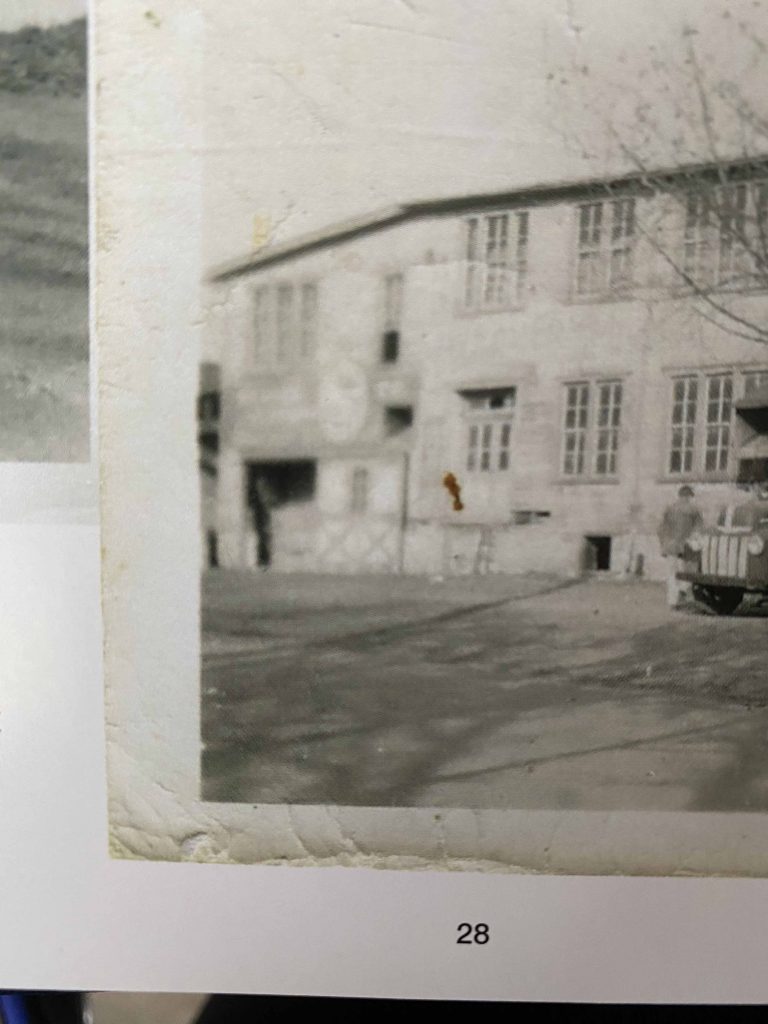
The team also wanted objects to be in the book, and again, photographing all the objects in the archive was key. To photograph something, be careful to get the right angle and light. In general, you’ll want to photograph them straight on and in natural light. I tried moving the object around in different light and always photographed it on a solid background for easy extraction.

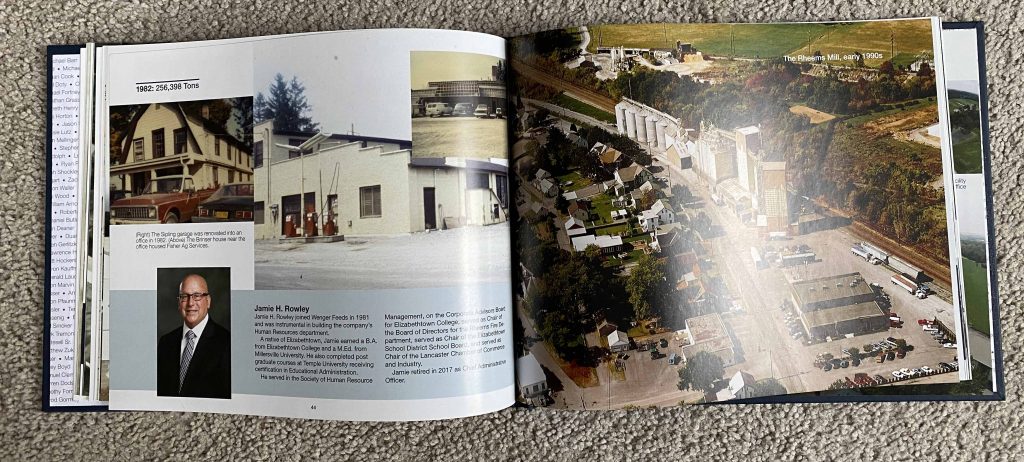
Some of the stories I collected became small sidebars in the book. These included sidebars on the contributions of the company’s key executives. Since some of them were retired, I also organized professional head shots for them. If you have photos you need to schedule like a head shot, be sure to add that time into your timeline. Also, be sure to allow the subject to select the final head shot used. It’s a small courtesy that goes a long way to building trust in the project.
The editing process was long and laborious and went on for months. If you have the opportunity, agree on the text first and then add your assets and begin the design. You’ll save time.
When the time came for final proofing, I was unable to secure a professional proofreader after reaching out to several. Since it was important that it be both grammatically correct and historically so, I passed the draft to scores of individuals who were interviewed for the book or had extensive history with the company. They helped ensure it was accurate on both counts.
This is also where my extra time came in. I didn’t send it to the printer until I really felt it was done and my drafts were being returned with few corrections.
As with any history, the story is never really finished. Once you send it to the printer, the company leadership may change, people will come and go, and the company will change.
The team for this project had a hard time knowing when it was done and wanted to add things. This gave me heartburn as the project was already on press. I tended to think of it as a point in time. You can always write volume two when the time comes.
The final book was delivered on deadline. The final page count was 84 pages.
Just keep your lines of communication open. As with any job, you’ll want to meet your client’s expectations.
If you need help with a similar project and want to chat, hit me up at my contact page. I’m always happy to help.