I didn’t find a lot of help with this issue, so I am putting in here in the event this solution is of service.
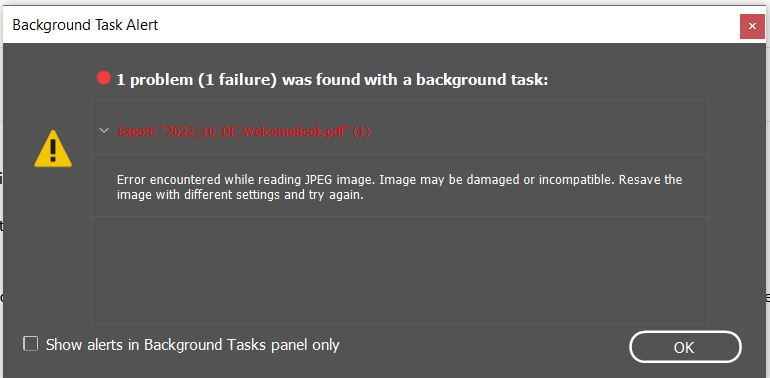
I encountered an error when exporting to pdf from InDesign. “Error encountered while reading JPEG image.”
What worked was exporting each page as a jpeg and seeing which one wouldn’t export.
Then, I opened the jpegs on that page until I found one that wouldn’t open in Photoshop. I’m not sure how the file was corrupted, but it was. Finding the original file and placing it back in InDesign worked.
In mid-October, my husband and I began our regular visits to NYC to attend NY Jets games in nearby New Jersey. As usual, we booked a hotel within short walking distance of L’Express, our favorite breakfast haunt on 20th and Park Ave.
This week’s hotel choice was a new 42-story tower on 24th street. We were on the 10th floor, and therefore, had to take one of the four, later reduced to three, elevators in operation.
When I’m on a lower floor, I just take the stairs.
As we were waiting for an elevator down, it struck me how many stairs there would be in the event of a fire, and then I thought back to the City Museum in St. Louis. This hodgepodge isn’t really a museum so much as an interactive art installation, and one of their draws is a series of huge indoor slides that start near the roof.
Could slides be installed to take fire evacuees to the ground level? I think you could build them to fit in a stairwell. Sure there would be some accidents, and you’d get a bit head of steam rolling if you went down 42 floors. However, you could also ensure that the handicapped and disabled could use them. They’re pretty easy to use, no explanation is required, you do not have to be propelled by legs or arms, and each floor could be attached to the main slide allowing entry at every level.
For any project, you need a reason. You’re about to spend (or pay someone else to spend) a lot of time building an archive and writing your history. What do you hope to get in return?
For a corporate history, do you feel your customers will value knowing more about you? Will what you have to say influence their decision to work with you or bind them to your company and its products? Is a company history “sticky” in your line of work?
For your team members, do you feel they will value knowing more about the history of the company they serve? Will it increase engagement? Will it aid in recruiting new talent? If so, why? How is your history relevant to your desirability as an employer?
Is it a legacy project? If you own a family business, is it intrinsically important to you to document the history for future generations?
Is this book part of your sustainability effort? Could looking at where you’ve come, what obstacles you’ve faced, and where you landed inform where you are going as a company? If you’re a privately-held business, a small business, or a family business, there is a good chance that your history isn’t recorded. Could a record help inform your future endeavors?
When I was working on my book project, I had to cover a devastating fire that destroyed a warehouse full of goods in the 1950s. Every family member I spoke with mentioned the fire. They all remembered where they were and how traumatic it was as an event as the cause was ruled to be arson.
However, they also remember how the business recovered. There was a period of mourning followed by a flurry of rebuilding with an eye to the future. What was rebuilt served the company better and helped change the direction of the business to where it landed today. The ownership went from focusing on a small footprint to thinking much bigger in terms of the scale of the customers they would serve.
There may be lessons to learn from the past in how you respond to future setbacks. It may be helpful to document changes in your industry and how your company adapted and evolved. Those same abilities to shift and change could be useful as you consider the future business environment and how you’ll meet future challenges.
Finding your motivation and the payoff before starting a project will help guide the project and ensure the book functions as you envisioned. It will also help guide the decisions you make with your creative team about the cost, time spent, and look of the final deliverable.
Should You Hire Someone
During my time working on this project, I met a freelance consultant who had done a company history and archive for McDonald’s. All her interviews were transcribed, and part of her process was to present a bound book of the interviews to each client she worked with. If you really just want to capture the memories, then this might be a good avenue for you. Search for an archivist near you.
If you do not wish to hire out the project, do you have a team in-house with the time to devote to it? See my prior post for the time estimate and consider it before assigning an in-house team. If you have someone great, can you clear their calendar to give them the time to devote to this project? Remember, this work is hard. Don’t burn out your best people by giving them a project of this size in addition to their regular workload. Give them the space to devote to it.
What Should the Book Look Like
The look of the book should help carry its purpose. The look is, essential, part of the message. Do you consider yourself a forward looking company? Then, consider a modern look and feel.
In the course of my work, several people passed along other company histories to me. One was a book celebrating the planning and construction of a new plant. This book, as you might expect, was bound with an integrated dust jacket, was full color, and was printed on glossy paper. The message: We’re growing. Hop aboard as a customer and as a team member. We have somewhere to go.
Another book given to me had an antique effect on the cover and most of the photographs were given a sepia tone effect. This didn’t send a message of a growing company. It spoke to a more conservative time and a reverence for the founders.
I’m not taking a side on the look you choose. Just think about it in reference to the message you want to send.
Who Will Print It
If this is the first time you’ve done a project like this, you’ll want to work with an experience printer who can answer your questions and doesn’t mind you stopping in to look at linen samples, paper samples, or being involved in the production. I, personally, like to spend money in my community, and I was delighted to find a company that could handle our size job locally.
Obviously, if you’re considering printing thousands of copies, you might have to look outside your neighborhood.
Is Digital Your Path
Maybe you’re not thinking print at all. Maybe digital is the right way to go. If so, you’ll save yourself the cost of printing; although, the research, writing, and layout process may be very similar.
If you have video or audio files in your archive, digital may also be the right choice as you can incorporate those elements.
If you decide to do both, it is fairly easy to create an ePub from your print InDesign file. If your book has a lot of pictures and the exact layout is important, you’ll want to consider a type of ePub that preserves the layout. This functions essentially as a web page with everything precisely positioned. If your book is mostly text, your ePub transition will be even easier as the text can flow like a web page around the natural marker of chapters and sections.
Think about both formats, how you’d distribute them, and what they say about your brand. If you’re using this to recruit new team members, the digital format could be put on your web site for easy distribution.
Distribution
Once you’ve completed the book, how will you distribute it? This is helpful to consider before you start as it could help inform the binding and cost structure of the book. In my case, our costs ran about $20/book for 1,000 copies.
If you spend this amount for this print run, do you have 1,000 people to give them to? Will you give them to your closest customers or your team?
If you’ve spent the money and the time, should you also consider an event to launch the book? If you plan on giving it to customers and prospects, an event might be just the thing to make it feel special and unique. An event could work for either format, but it would be most helpful for a print book. You can tuck them inside a swag bag for your guests.
Shelf Life
When I worked on my project, there was some concern about the shelf life of the book. One volume given to me as a sample was actually the first of two corporate histories produced for a company that was over 100 years old. Think about your history as just that – a point in time. Don’t try to slap in extra pages or get upset when the company changes. Capture your growth for volume two.
This is also a reason why your focus on distribution is important. Get your volumes out there while they matter. Don’t let them gather dust.
Happy book writing.
As always, if you have a question or want to chat, hit me up.
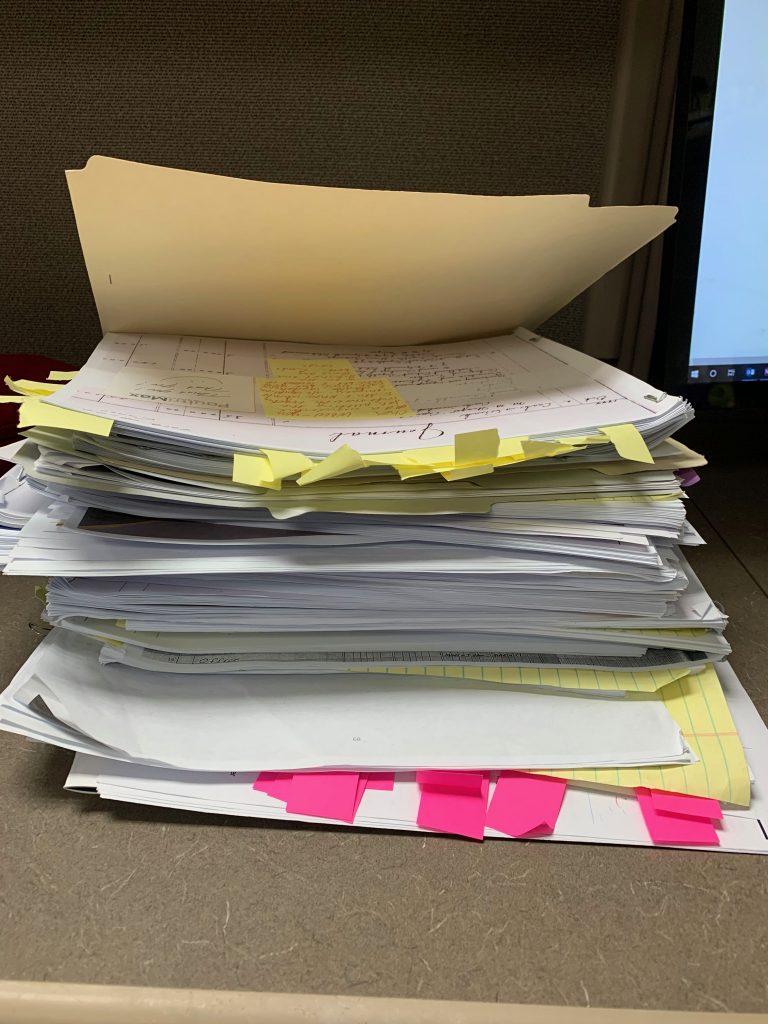
This is the stack of paper drafts I had on my desk after the editing process. I let it sit there for months before throwing them out.
In 2019, I finished writing and designing a company history book, which was a project that originally began in 2014. Due to the complexity of the project, I’m going to explain my process here for those that are starting a project like this and need advice. I found little in my journey. The advice below could be adapted for similar complex research, writing, and design projects.
Background
Writing a book is hard. You’ll get attached to the project and the people you meet, but remember, if you’re hired to write a company history, you’re essentially a ghost writer. It’s not personal to you even if it feels like it. Don’t be disappointed if you can’t add this work to your portfolio or make a claim as an author. Don’t worry. You still get to claim the experience, and that’s not nothing.
Archive Building Process
You’re going to need artifacts and lots of them. Start the process by collecting everything you can about the project and organizing it in an archive. You’ll want to organize items in chronological order if possible.
For my project, I had three boxes of photos that I organized in chronological order within the boxes. Each box was then numbered with number one being the oldest photos.
To date photos, it’s helpful to look at the cars in the photos. It’s fairly easy to date a car by year, which will give you a rough idea of the date of the photo.
If you can’t date the cars, consider contacting a car club for the brand in question. They’ll happily give you a hand.
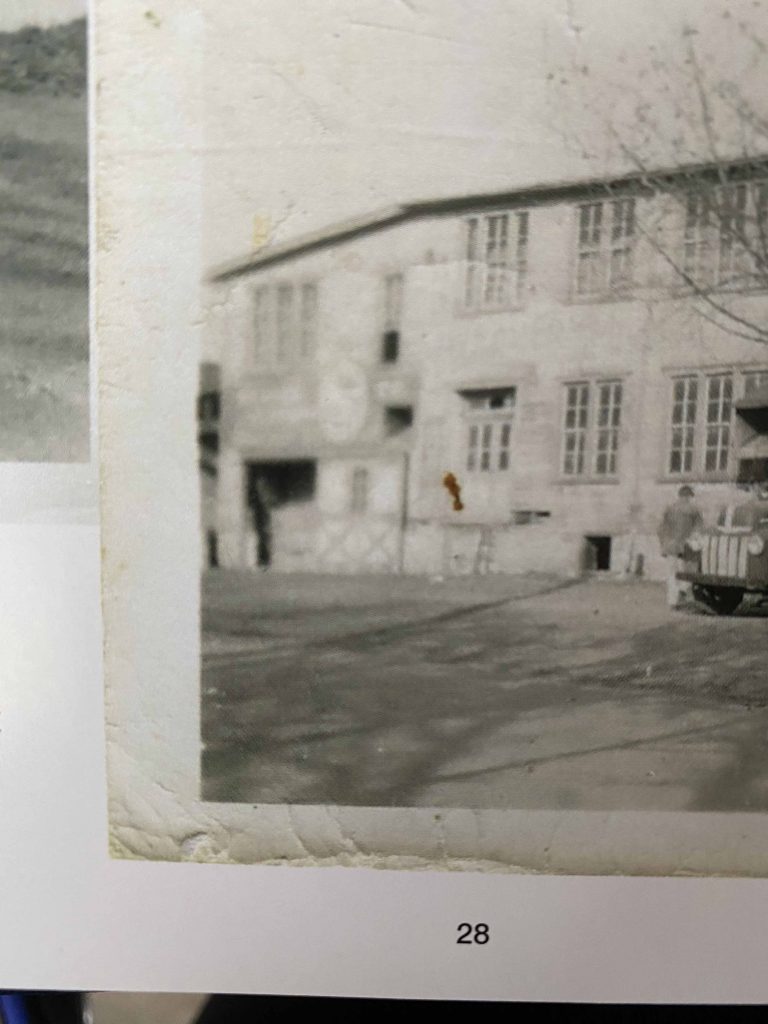
For location photos, I posted several in Facebook groups dedicated to the town where the company was located. The users on the group were very helpful in dating the location photos based on changes in the landscape and their general experience with the area.
I saved all the messages and input I received from these sources to share with the team.
The paper documents were also placed in boxes and organized by year. Some of the paper documents given to me were already in three ring binders in sleeves. I left those intact.
If you’re storing printed material or any material really, you only need a few samples of each item. Your archive is going to be huge, so don’t save a box of brochures, cards, or calendars. You won’t have room.
Digitize everything you can. Digital archives will make it much easier to view and select the material later on. Don’t keep negatives, slides, reel-to-reel, 8-tracks, cassette tapes, VHS tapes, or DVDs. If you can’t play them or view them in the future, don’t keep them.
Find a vendor to digitize all your material, and then store it in the cloud. You’ll need a drum scanner to do your slides, and many camera shops have this equipment and can do it for a small fee per slide. If you can, view the material before you commit to digitizing it. Deciding it if is worth keeping first will save your budget.
There were several customer presentations that I did not save as they really didn’t relate to the company’s history.
For the items, take a photo of each item. If you can document the size of the item, do so. For the frames, I documented the size. Then, select a way of organizing this material that makes sense for your project.
For me, I had no way of dating most of the items, so I organized it by type. The company had made several acquisitions and had changed names several times. Those felt like natural breaking points to label the boxes.
Organize all the actual items in a spreadsheet. I made an attempt to organize my spreadsheet by date and type. The columns included the item name, a decade (this may be an educated guess), the image number that corresponded to the item, and the box the item was stored in.
Professional archives will also number each item and attach a tag to each item with the reference number. Porcelain items contain a small label that is attached and then painted over with a clear adhesive. I did not take this extra step, but you may consider it.
Check out the Metropolitan Museum of Art’s furniture archive in the northwest wing of the museum. It’s located near the American Furniture wing. This space is organized like an archive with climate controlled shelving and furniture placed on open air shelves. You can see the tagging system in action.
This sounds like a lot of work, but once you’re in the process, you will be glad you did this legwork ahead of time.
As you’re organizing your archive, be very deliberate about what you save. If the item is interesting but doesn’t relate to the company you’re profiling, you may not want to keep it. Consider donating it to your local historical society.
Also, do not keep anything that could be considered food. You won’t be in your archive every day, and if you store anything that could be eaten, insects may find it and eat it and everything around it before you know something is amiss. For me, I had a few boxes of old animal feed that I threw out for safety reasons.
If you need help with your archival process, consider contacting your local historical society. Lancaster History was a great help to me in the process. I toured their facility after I had constructed my archive and made some changes based on their suggestions. https://www.lancasterhistory.org/
Proper Storage
Historical items need special attention due to their age. Store your items in a climate controlled room with speciality boxes and materials. If you are using wooden shelves, be sure to cover them in plexiglass. Many shelving units are constructed with oriented strand board (OSB) or plywood, which are both constructed with glue. Over time, this material breathes, and the fumes can damage your items. I had a local sign vendor make sheets of acrylic to cover the shelves.
The material storage was one change I made after consulting a professional archive. Store your documents and fabrics in acid-free boxes with acid-free tissue paper to prevent discoloration.
If you’re working with a company, chances are there is at least one individual that will be your primary source material and contact. This person may even have been the individual driving the project. Be sure to find out who this is and start here. You’re going to want to spend a lot of time with this person. They’re also going to be really excited to share their knowledge and the conversation may go everywhere.
Try to start with a general outline of the history desired and then steer your conversation in blocks of time so you don’t miss anything. Be prepared to backtrack frequently to gather all the threads of the story.
One hour blocks of time will provide a wealth of information without exhausting the contributor. If you’re working with executives, chances are they won’t have more than an hour to spare anyway. Write your questions down and ask them in order to ensure you make the most of the time.
Record your conversation. I used the iPhone’s voice memo tool. Be sure to check your device to ensure it is recording and place it close to the speaker. I never used two devices to record, but you may consider it for backup. You don’t want to have to recreate an interview.
You can transcribe it yourself if you have the time. I did some of my own but also relied heavily on Rev. https://www.rev.com/
Read over the transcript carefully to prepare for your next interview and determine other interview subjects.
If you have to contact outside resources, be sure to tell them you need their time for a history book. Most people will be happy to help. For my interview subjects, I could promise them both a book and an invitation to a book launch event. I often also bought them lunch or coffee and met in an informal setting. I think most would have talked to me even without those enticements.
The interview phase could last for months or years depending on the time you have to devote to the project.
Be sure to have questions prepared for everyone you plan to talk to. I started each interview with small talk while the recorder was running. Recording a conversation can make someone nervous, so it’s important to make them feel at ease before you start.
Also, some people will be more interested in talking than others even if you suspect they have something to share. My shortest interview was ten minutes. My longest was four hours.
Finally, pick a quiet place. If you’re going to a coffee shop, stop by the business at the time you plan to be there to determine the atmosphere. One interview I had turned out to be in a loud restaurant, and as a result, the conversation was very hard to transcribe.
Once you have the interviews in hand and the archive constructed, you’re ready to begin writing.
Read on.
The Writing Process
Start by reading all your interviews and highlighting the text you wish to use. I made a handwritten outline of the story and filled in blocks of interviews I wanted to use in each section.
I worked solely on this project for one day a week for about three months just to get the text outline in place.
If you have something spectacular that may not fit, be sure to mark it. It may fit in a special aside or in the back material. For my project, the company history was also a family history in many respects. I asked everyone for their personal memories of the company founder and eventually used all that material in the back material of the book.
When you’re writing, be sure to make it interesting while keeping the story moving. If you’ve been hired to write this, you’re sure to have a handful of editors to please. Be sure to ask questions when the changes come back. For my project, it was helpful to edit the pages with the main editor and driver of the project looking over my shoulder. It can be hard to interpret someone’s written notes, and time is money. Ask for clarification.
I would have preferred to finish the text prior to starting the design, but the desire of the team was that both be done at once. I had a longer draft written in Word with marks to indicate what assets I wanted on which pages. This was a general design outline, and the final version looked much different.
Finding a Printer
Check around your area for a printer that can do a case bound book. It’s a little different type of printing, and the lead time is much longer. Try three months in my case.
If your book must be published in a certain time frame, be sure to build a timeline that will work for you and carefully convey that timeline to your team. For me, I built in an extra three weeks that I didn’t share with the team. This gave me some overflow time. It turns out I needed it, so be wise in creating your expectations.
Be sure to consult with your printer about the page layout. The team had already selected the size book they wanted, which was 11 inches wide by 9 inches tall.
For my project, I laid out the text in InDesign with the standard page size plus a .5 in margin on each side and a .2 in bleed. This is going to be perfect bound, so page count didn’t have to be a multiple of two. The gutters were no larger than the other margins.
Per the printer’s request, this was also laid out without facing pages. When I printed the drafts for review, I stapled them together to indicate the spreads.
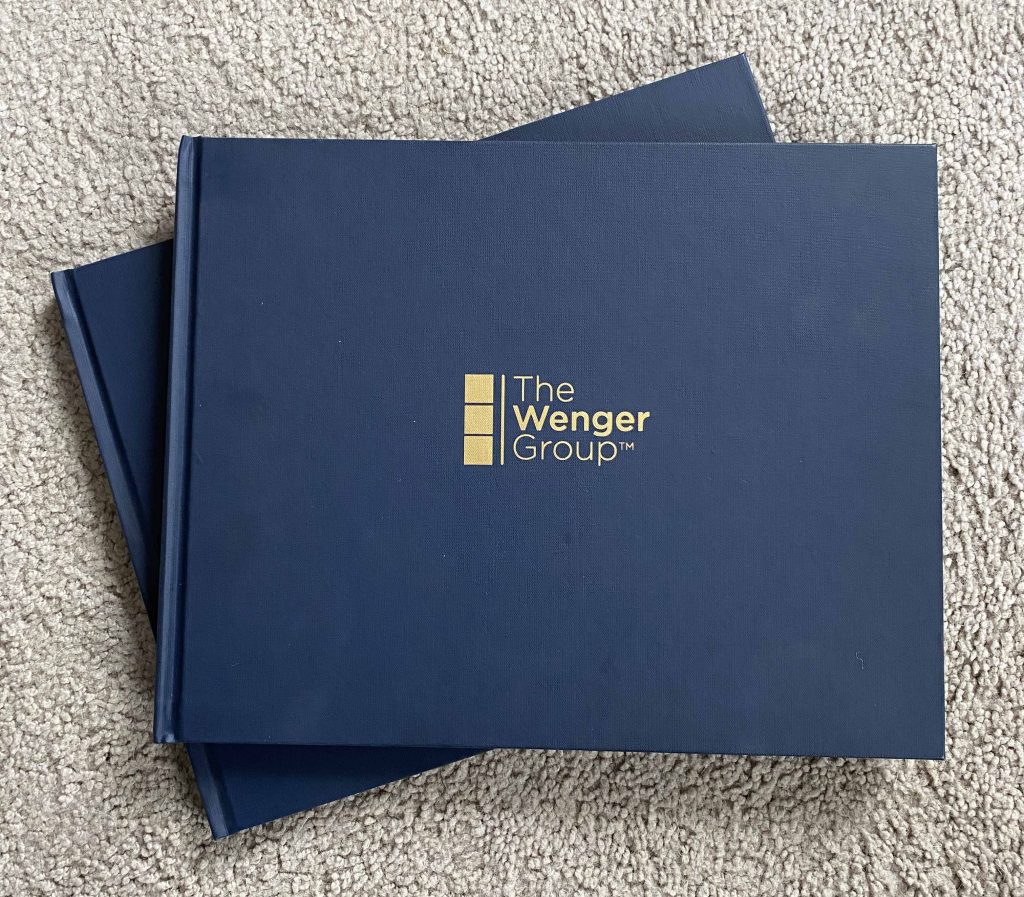
The outer material is actually linen, and you have some choice in color. I borrowed a linen swatch book from the printer, and the team selected a dark navy with a gold embossed imprint on the cover and spine. There was no dust jacket.
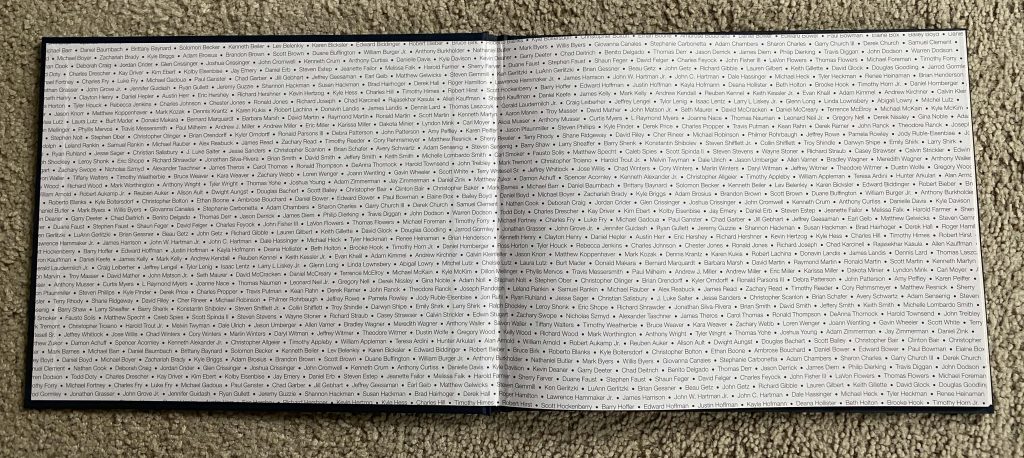
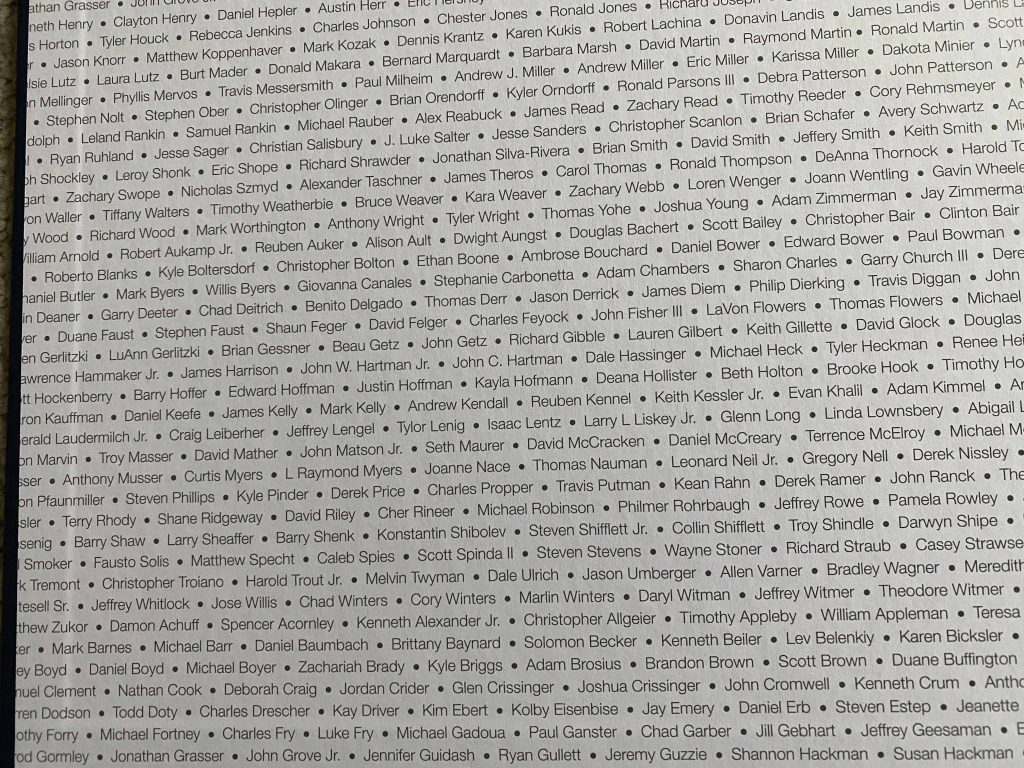
For my project, the endpapers were also printed. This is the page at the beginning and end of a book that adheres to the hard cover. They can be printed on one side. This was laid out in InDesign with bleeds.
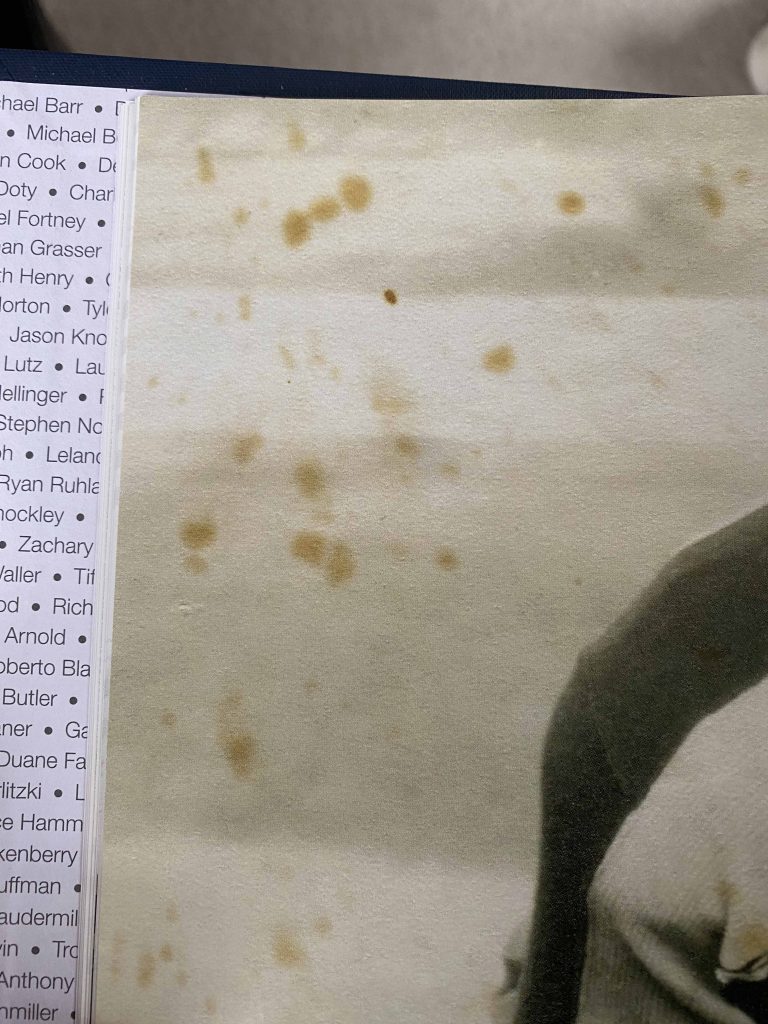
The end papers were printed with the names of all the employees at the company at that time. The team was concerned that every person in the list was able to find their name, so I sized the text so the entire list was repeated three times. There were small bullet glyphs in between the names for separation.
The end pages were printed with the names of all the employees of the company at the time the book was printed. Each name was separated with a bullet glyph. The entire list of names was repeated three times, so each person was able to find their names. Can you find mine? This detail was very well received by the entire team.
Costs
The cost to print 1,000 of these books was roughly $20 a copy.
Given the amount of work involved, if I were to freelance a similar project, I would have charged $50/hour at minimum. If you’re quoting a job, make sure to figure in expenses like travel, meals and drinks for your interview subjects, and transcription fees. If you aren’t setting up the archive, make sure it is set up in a way that is going to be suitable for your project.
Design
Once the book is laid out, it’s time to settle on a design. For this project, the team had a similar book they were hoping to replicate. This was heavy on images and light on text.
I set up the book with master pages to contain the page numbers and with several different grids to keep the design consistent. The company brand’s secondary colors served as the basis for the color palette. The brand standards also dictated the fonts, which were ITC Garamond and Gotham.
Once you have the base set up, it’s time to select the assets for each page.
Now, aren’t you happy you photographed everything in your archive?
Sure you are.
Start with the lowest hanging fruit – the photographs. I took my three boxes of carefully curated photos to my desk and has an assistant scan them as I needed them.
For the personal story of the founder’s life that started the book, I asked the family for some personal photos. I even took some things off the wall at one of the interview subject’s houses. For framed photographs, I took them to a professional framer to have them removed and reframed.
If you’re working with someone else’s assets, be sure to return them quickly and in great condition. You don’t want to be responsible for an heirloom going missing or being damaged.
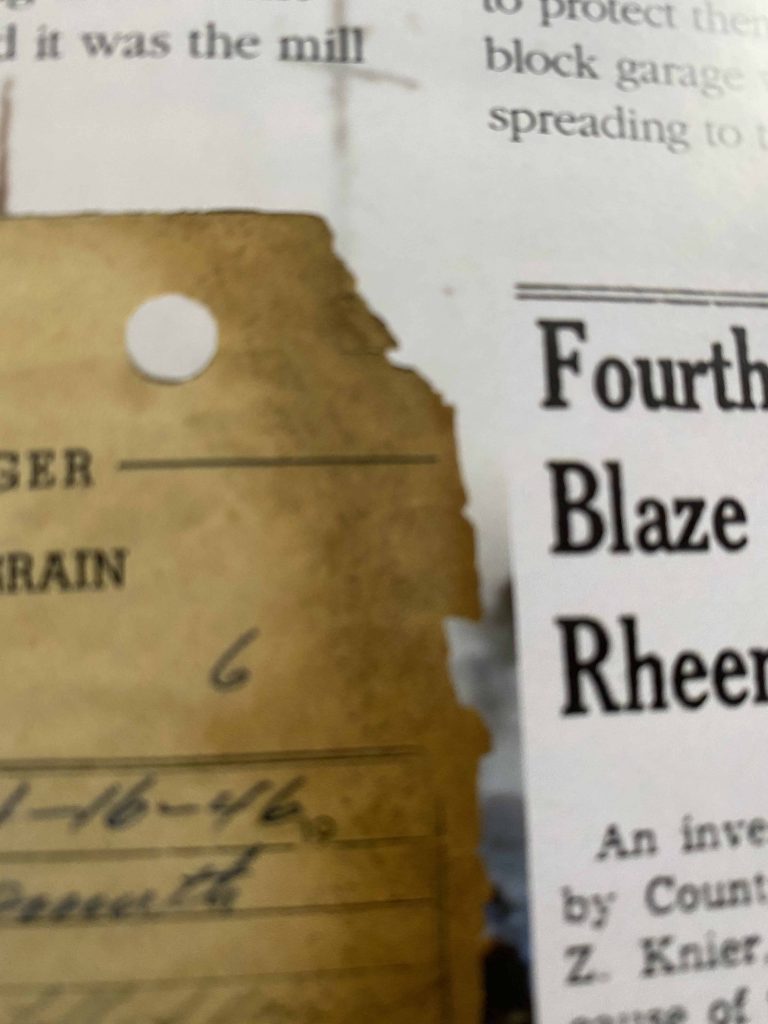
Speaking of damaged, some of the photos I had access to were damaged including color fading and discoloration, torn edges, and foxing. I left the damage in rather than editing it out. To me, it added to the authenticity of the book to leave it in.
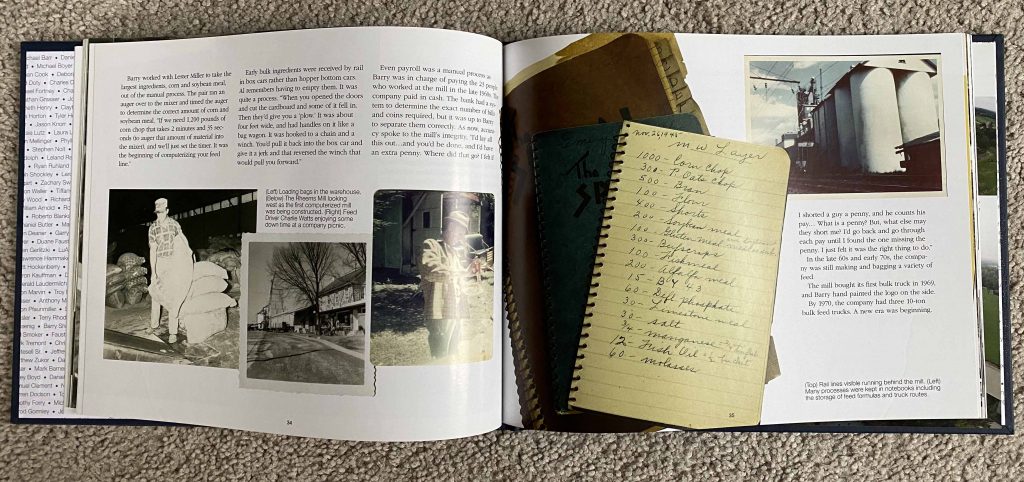
Some of the photos were damaged including foxing. I left the damage in the final photo for authenticity.This burnt receipt was scanned and then used on a page that described a fire the company experienced. In this case, the damage to an artifact told the story.
Nearly all of the photos I had were printed photos, and they were scanned with a flatbed scanner. This is time consuming, so get help if you can.
I asked that the photos be scanned in the middle of the bed if possible so that the edges of the photos were accessible to me. I also, in many cases, used the slight shadow created by the scanner in the final result. This allowed the items to appear as if they’re floating off the page without adding a shadow effect in InDesign. Also, if the photos are torn or cracked or have those lovely scalloped edges, you can take advantage of that authentic detail.
I had the items scanned in the middle of the scanner bed to capture folds, cracks, and tears in the edges of the photograph.
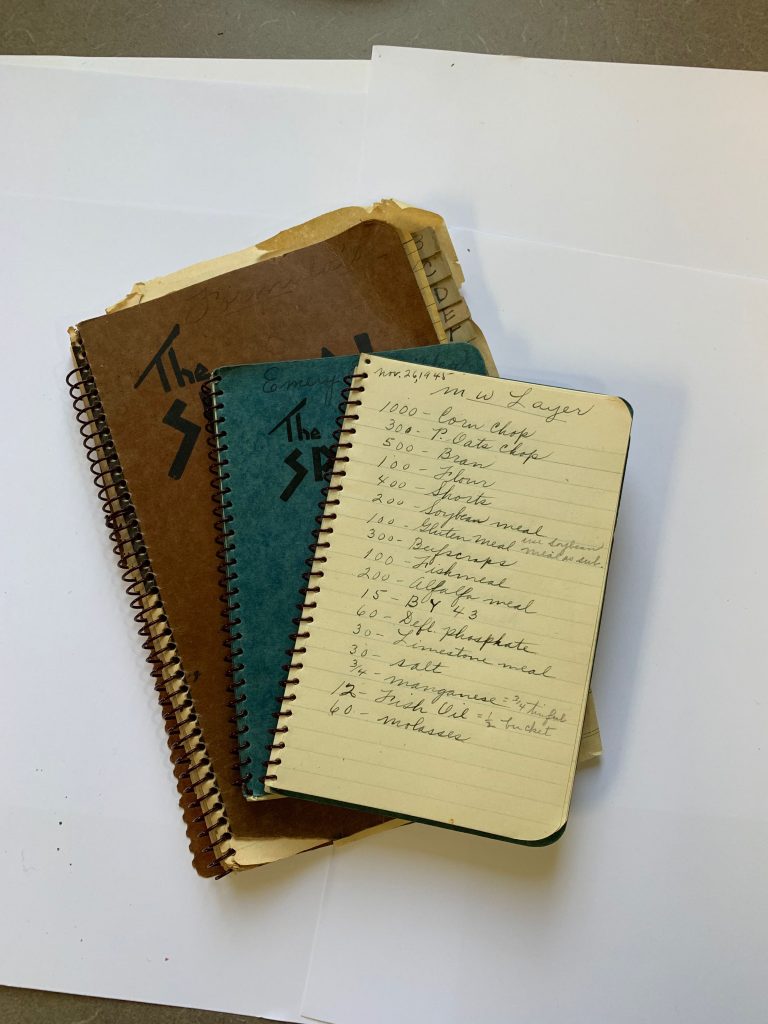
The team also wanted objects to be in the book, and again, photographing all the objects in the archive was key. To photograph something, be careful to get the right angle and light. In general, you’ll want to photograph them straight on and in natural light. I tried moving the object around in different light and always photographed it on a solid background for easy extraction.
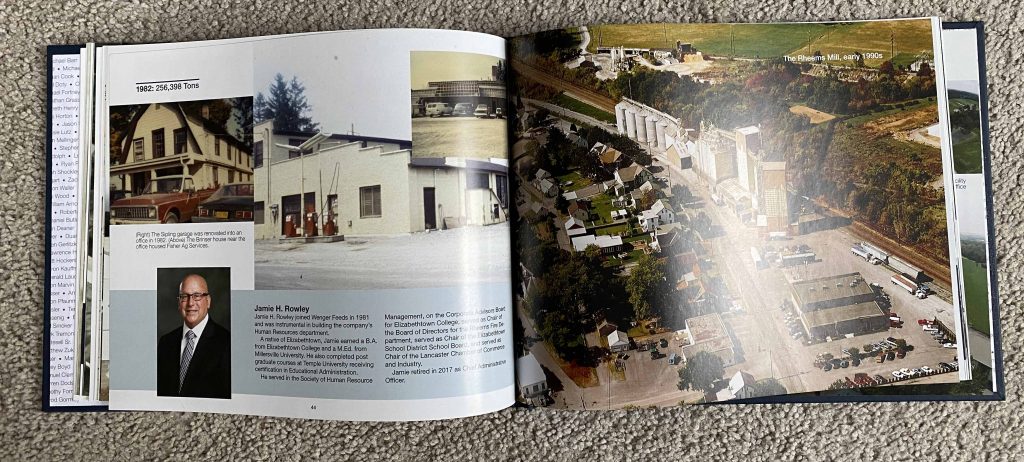
These hand written journals were photographed with an iPhone for a company history book. As with scanned material, I left the slight shadows around the edges to help pull the images off the page without using a shadow effect in InDesign.This item was photographed with an iPhone for use in a company history book. Be sure to photograph the item straight on with a solid color background to make it easier to extract in Photoshop.The interior pages were laid out in several grids so the design remained consistent. Here you can see the object shown above as it appeared in the book. Some stories became sidebars including small sidebars on the contributions of key executives in the company’s history. Since some of them were retired, I also had to organize a professional head shot for them. In exchange for their patience and time, I gave them the headshots.
Some of the stories I collected became small sidebars in the book. These included sidebars on the contributions of the company’s key executives. Since some of them were retired, I also organized professional head shots for them. If you have photos you need to schedule like a head shot, be sure to add that time into your timeline. Also, be sure to allow the subject to select the final head shot used. It’s a small courtesy that goes a long way to building trust in the project.
The editing process was long and laborious and went on for months. If you have the opportunity, agree on the text first and then add your assets and begin the design. You’ll save time.
When the time came for final proofing, I was unable to secure a professional proofreader after reaching out to several. Since it was important that it be both grammatically correct and historically so, I passed the draft to scores of individuals who were interviewed for the book or had extensive history with the company. They helped ensure it was accurate on both counts.
This is also where my extra time came in. I didn’t send it to the printer until I really felt it was done and my drafts were being returned with few corrections.
As with any history, the story is never really finished. Once you send it to the printer, the company leadership may change, people will come and go, and the company will change.
The team for this project had a hard time knowing when it was done and wanted to add things. This gave me heartburn as the project was already on press. I tended to think of it as a point in time. You can always write volume two when the time comes.
The final book was delivered on deadline. The final page count was 84 pages.
Just keep your lines of communication open. As with any job, you’ll want to meet your client’s expectations.
The final case bound book in navy linen with gold embossed cover and spine.
If you need help with a similar project and want to chat, hit me up at my contact page. I’m always happy to help.
This is an error I see a lot. Quotation marks are rounded. Prime marks are not. Here the designer used double prime marks to set off TheFreshest Guy in Town!
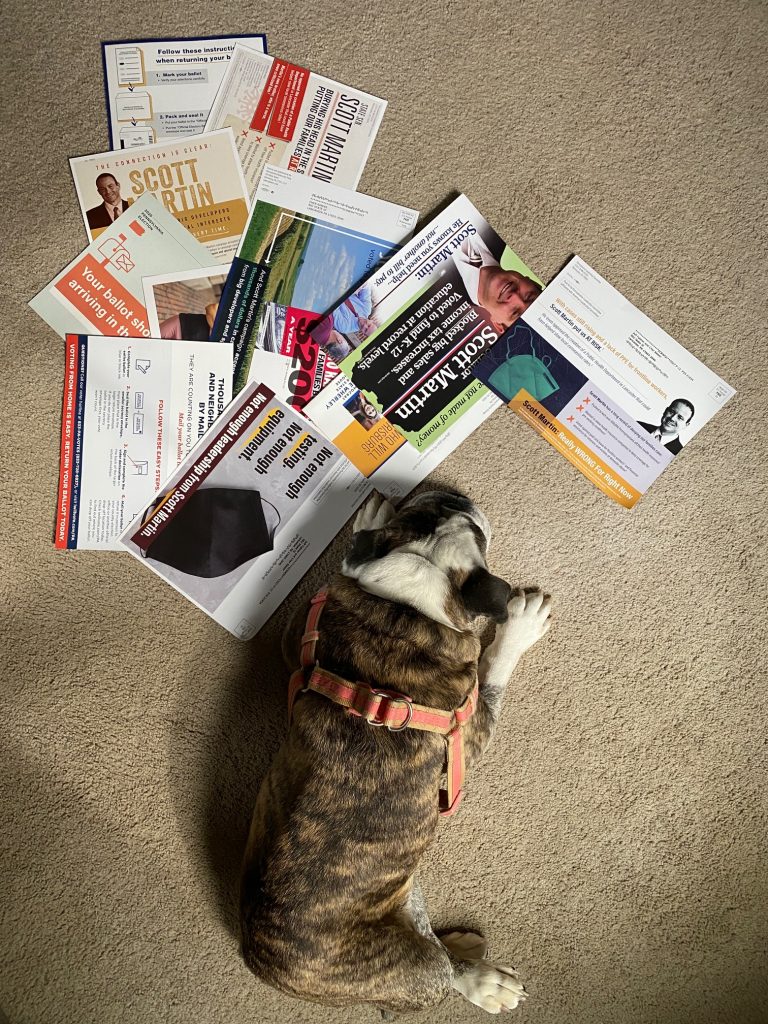
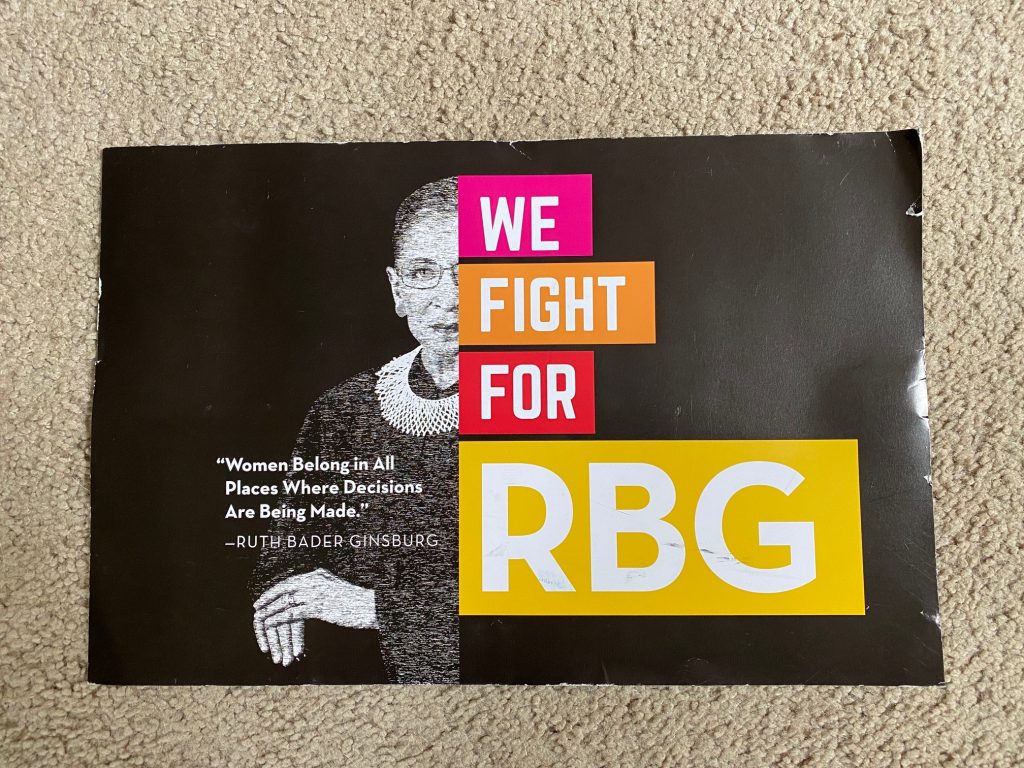
I live in Pennsylvania, which means that this year I got to see what it was like to live in Iowa during primary season. Highways were backed up as the candidates visited, and I got mail. Tons of it.
There were some inspiring pieces, and I ended up using one as a template for a direct mail job that I designed. Incidentally, the campaign was very successful, so maybe those 8.5 by 11 in mailers work after all.
This piece in particular moved me. Inspiring subject and deft typography. Game recognize game.
I get endless surveys. I get one each time I stop at CVS. I get one each time I go to the doctor’s office. Any doctor. We go to a restaurant near our house several times a week. I get one on every receipt. I’m a heavy user of Adobe products, and I get a 15-minute survey from them virtually every month. Is all this feedback necessary? Am I not voting with my presence, with my dollars?
As a designer, my work is very visible. Large projects are especially so, and I do have an internal team of critics. There are a handful of people that find fault with virtually any effort, and they tell me so. I always read the comments, but I rarely respond.
Their feedback does rattle around in my brain at the next juncture, and it has made me better. Better at parsing those small slights that I clearly miss. “Why did you list this department first in the agenda.?” Only because they came through first in the paperwork. Nothing nefarious, but we’ll switch that up next time. I’ve noticed that entire divisions feel left out because they are physically more remote from the corporate office. As a result, I’ve made them first by design the next time a job comes around. I make notes to physically visit on a regular basis. Do they notice? I’m never sure, but the effort is what matters.
Does it make me feel bad? Full disclosure – it used to, but it doesn’t anymore. I think it speaks to the power of design. These projects project the company culture, and that’s not nothing. I should be careful, and I am. My critics just point to the holes.
The thing about complaints is that most people are more apt to say when they’re unhappy than to recognize a move in their direction.
The small kindness is always worth it. Always. It improves your work and breeds inclusion. Just don’t expect it to be noted on the comment cards.
I just finished a Content Marketing class at the Pennsylvania College of Art and Design. This was just one of a series of Continuing Education classes they offer in the evenings and on weekends every semester. It’s a great way to increase arts education, serve the community, build a base of supporters and potential donors, and better use the building. Continuing education students might not turn into full-time students, but they learn their craft and come to love the school. Like I did.
One of the things I love about the school is the instructors. They’re working professionals. Like Ken Mueller, my instructor for Content Marketing. Ken does marketing for Occupational Development Center, a facility that helps gives jobs and purpose to adults with intellectual disabilities.
Ken also teaches the Intro to Social Media class and most of the classes in this certificate series. He also taught the full semester course for PCAD’s full time students.
During the last class, he mentioned that the full-time students have to take social media, and they often aren’t into it. He joked that an 18-year old Ken might not have been into it either.
I get that, but they’re missing an opportunity.
I have two degrees in English. When I left graduate school, I landed in an insurance brokerage firm with a copy of Adobe PageMaker 6.5. I wasn’t a designer, but designing the internal newsletter was part of my job.
Being open to that experience allowed me to build a career in design. I’m a very good designer now and a competent photographer. Both skills support my writing. You know – the thing I went to school for?
I began my graduate work a few weeks after receiving my undergraduate degree. I knew I didn’t want to leave school, and I kind of never have. You shouldn’t either.
Here’s why.
I work in technology. Everything changes all the time. Being ok with being a student turned out to be a huge advantage, and it will continue to be as the world of work changes in nearly every field.
Those who learn will flourish
Tom Peters recently noted on Kara Swisher’s Recode: Decode podcast that the ability to be dedicated to reeducation will allow you to flourish in a time of change:
I believe that the 40-year-old who is totally dedicated to reeducation every single day of the year is gonna make it and is gonna flourish. I think that they are going to flourish by being a value to some customer set, for God’s sakes.
It’s not new. It is not new. My wife and I have a sub-zero refrigerator and the compressor went out. The guy came to fix it. I chat with everybody. Here’s a guy who I would guess is 40, 45 years old. He has a little utility company that helps do appliances, six people. He had just gotten back from a two-week training course that he had paid for out of his own pocket on the Internet of Things. You know, when refrigerators start ordering your stuff for you.
I think he’s gonna survive, and I think he’s gonna thrive. I think there’s a good chance that his six-person company will be a 16-person company. I am incredibly optimistic about people like that.
This is an era of rapid change, and Swisher’s podcasts have focused heavily on the world of work. Peters contends that being dedicated to reeducation means survival. It sounds drastic, but is it?
How many things have changed in your job since you started 5 years ago, 10? If you just started, what do you think your occupation will look like in 5 years, 10?
Different? Yes. Radically different. Very possible.
Online or in class
My degrees are in English, but a good chunk of my work is in print and web design. To bolster my career, I earned a design certificate from The Pennsylvania College of Art and Design about a decade ago. I’ve taken classes there ever since for both professional development and for personal growth.
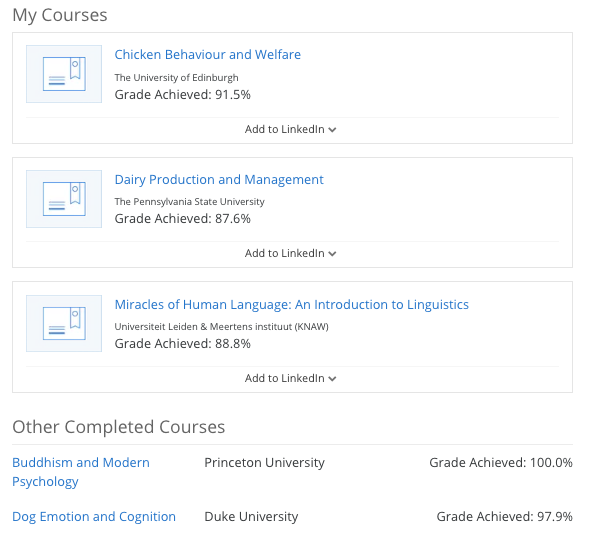
I also use Lynda.com, Skillshare.com, and Coursera.org for access to specialty courses, world class instructors, and general training. They’re great resources and very affordable. Lynda and Skillshare have low introductory offers. Some Coursera courses are available to audit for free.
In some ways, it’s never been a better time to need a constant education because the resources are available and plentiful. Choose carefully. Get recommendations from others, and fire up that web browser or get thee to a classroom. You’ll be glad you did.
My completed courses at Coursera.org. I’ve used this site for both professional and personal development.
My parents will celebrate their 45th Wedding Anniversary later this month. I took some photos for them, so they would replace their photos of me at 18.
Tools used: A Canon 5D Mark II, 16-35mm f2.8 Canon lens, two Canon speedlites, Pocket Wizards, a tripod, a light stand, an umbrella.